
I have always been fond of procedurally created worlds and the pure sense of adventure they spark. They can be the defining factor which makes a repetitive game interesting; breaking up the monotony of playing the same level and tile set time and time again.
While there are many different techniques in the world of PCG, I chose Marching Cubes. I deemed it fitting for the given time frame, and challenging enough so I'd actually learn something from it. This also led me to choose Unreal as the development environment.
I had minimal prior experience in Unreal and saw it as an opportunity to gain knowledge in one of the premier Development Environments on the market.

Procedural Generation: while hand crafting unique environments may fit for most gameplay experiences, some simply need a bit of randomization.
Using Procedural Generation we can give the Players a more varied gameplay loop with a new environment every session or adventure. This technique is often used in Session-Based-Games or Open-World-Games to provide a low-poly look but can be customized further to give a more realistic look. It can also be used by developers as a base for creating a level, which they then customize and decorate as they see fit.
Marching Cubes is an Algorithm which aims to create a triangular mesh from a volume with values.
The Algorithm "marches" through the volume with a cube and samples values from the volume in its 8 corners, and then determines what mesh should be created there to connect all the dots.
It does this by referencing several look-up-tables which contain all the necessary data needed to create a mesh inside the current cube.
This process continues until the entire volume has now been filled with a Mesh.
Sebastian Lague, 2020, Coding Adventure: Marching Cubes [Video]. Youtube. https://youtu.be/M3iI2l0ltbE?si=1BkGcIOTbHjhC4sI
The goal of this project was to create a Tool for Randomly Generating Procedural Caves, that are then smoothed by the Marching Cubes Algorithm.
The Tool should have exposed variables and parameters as to let the User control the overall shape and form of the Caves and the frequency and location of its placed Objects. The Cave should also use different materials based on the angle of its normal to create varied faces on its walls & inclines from its floor and roof.
In the End the Tool would generate a Cave inside a Cube-Volume with multiple exposed parameters to allow the user to customize their caves. By using 3D perlin noise this cave would easily be able to generate further from the origin and be divided into separate chunks.
By undertaking this project I aimed to gain insight into how Unreal works and interacts with C++, as well as testing my time management and planning skills.
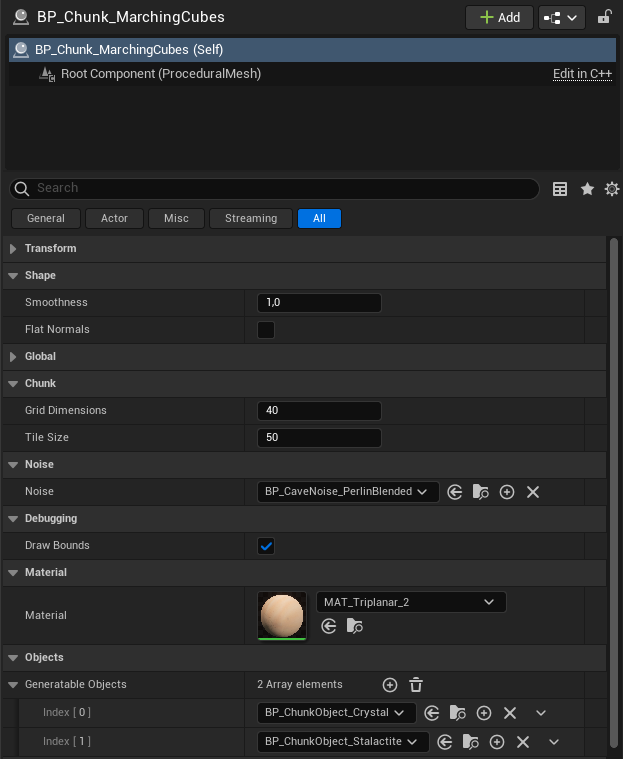
The final Tool has:
A simple 0-1 value determining how smooth the generated Mesh is.
By inheriting from the same base class we can easily create and switch what complexity of Noise we're using. The Project includes a Simple 3D Perlin Noise implementation and a Blended version, where a Noise is used to blend between 2 different Perlin Noises.
Also inheriting from a base class, the User can create different objects with functionality to be created on chosen surfaces by specifying an interval between two rotations. The Project features Stalactites and Crystals.
A Shader implementation in Unreal's Shader Graph which lets the User choose what each cave surface should look like.
I'm rather happy with the results and all the knowledge I've gained from working in Unreal.
The project itself is deemed as a complete success; as I fulfilled my planning within my given time frame with desirable results. I've found that ongoers from my class often take a stop to look and admire my Caves, where I can hold lengthy discussions about different games who have used similar techniques or achieved similar looks.
Working in Unreal was a learning process. While there are a couple of useful video guides, the minimal documentation meant I was mostly left to figure things out myself. Especially when it came to their C++ integration.
My determination led me forward and I eventually started figuring out the basic layout and how things worked in Unreal. I even pondered if I could create an implementation of the modular custom Noise in their Blueprint Event Graph and then bake it into C++ for performance. After a gruesome day this way however cut as I deemed it to take too much of the Project's time, while it would be nice and make the tool accessible for others without C++ knowledge, it would simply not leave me enough time left for finishing the system itself.
Simply; Kill your Darlings.
Originally, I did have a fun but way more complex idea for a Cave Generation Tool. It was ultimately turned down for much the same reasons as the Event Graph implementations; time constraint.
It would have been built around the user (or an algorithm) generating curves in the world, and splitting them into intersections wherever they wished. They would then be able to press a button to generate a Cave Mesh around this curve using the Marching Cubes algorithm.
This version lends itself to more mission based Games, where we can place desired rooms in the world and then connect them with the serpentine tunnels generated by the Tool. As well as being a more Tool-like implementation which is way more friendly towards non-programmers than the current system.
(Click to Enhance)
I would probably be able to create a simple implementation of this version if it was in one of our Custom Engines where I have complete control over everything. But as I wanted to learn Unreal it was simply not plausible for the time being.
Perhaps I'll create it some day in the future? It is after all a shame to let such an idea rest and be forgotten.
Something I would really love to implement was Biomes, by using another Noise to determine where Biomes are generated we can create a much more varied world. The user would be able to create different kinds of biomes that feature different triplanar materials and objects to be generated. Inbetween these biomes, in the gray zones, the standard Cave system would generate.
I'd also like to get a deeper insight into creating custom UI for Unreal so that I can create proper tools with a better UX, like creating radial dials and other things to better visualize what the user is inputting.
Otherwise, I would also like to optimize the logic behind infinite generation and create a more complex system. This is something I would easily be able to do in one of our Custom Engines, but as it's Unreal I seem to be bound to the limits of their Procedural Mesh Component. But surely there is a better integration in Unreal which allows for faster mesh generation. The current system also doesn't save what's been generated, meaning that the mesh will be the same but the objects will be totally different and all the terrain edits will be forgotten.
For a look into Infinite Worlds, you can check out the Specialization work that Jonathan Andersson has done.
Project Start! The first Week was all about Planning & Researching. As I had never used Unreal Engine before a lot of time went into setting up a Project and learning how Unreal interacts with C++ code.
Having used Unity for so long, Unreal certainly had... peculiar support for C++... but after familiarizing myself I got a bit of a headstart and started with generating Vertices and Meshes, aswell as setting up a 3D grid. While this 3D grid wouldn't be kept in the final implementation (due to having horrible performance); it served as the quickest and fastest way to simply implement and test 3D Perlin Noise, which will be explained in Week 2.

Pictured is a 5x5x5 grid filled with generated cubes.
Here the algorithm goes through each tile in the grid and creates a 3D Cube Mesh using Unreal's ProceduralMeshComponent, where we generate Vertices, Indices, Normals, and UVs.
After setting up and planning the Project in Week 1, I could finally start with working on the algorithm itself.
By retrieving a 3D perlin noise value from FMath::PerlinNoise3D, and deciding upon a floor value, we can determine what parts of the cube grid should be air and ground. As seen in the following image.
While the prototype method of using lots and lots of cube meshes worked until now, the performance was getting a bit out of control.
Restructuring
Having researched the subject extensively I began working on my own implementation. The mesh logic was optimized by structuring everything into a single Procedural Mesh Component per Chunk. This meant that some much more complex math for Vertices and Indices had to be done.
Luckily most of these problems are solved by publicly available Look-Up-Tables which most Marching Cubes implementations use. These tables tell us how to generate our vertices and their edges.
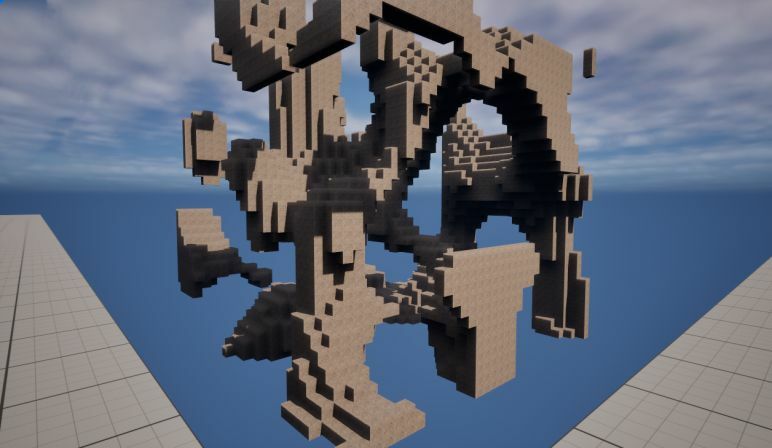
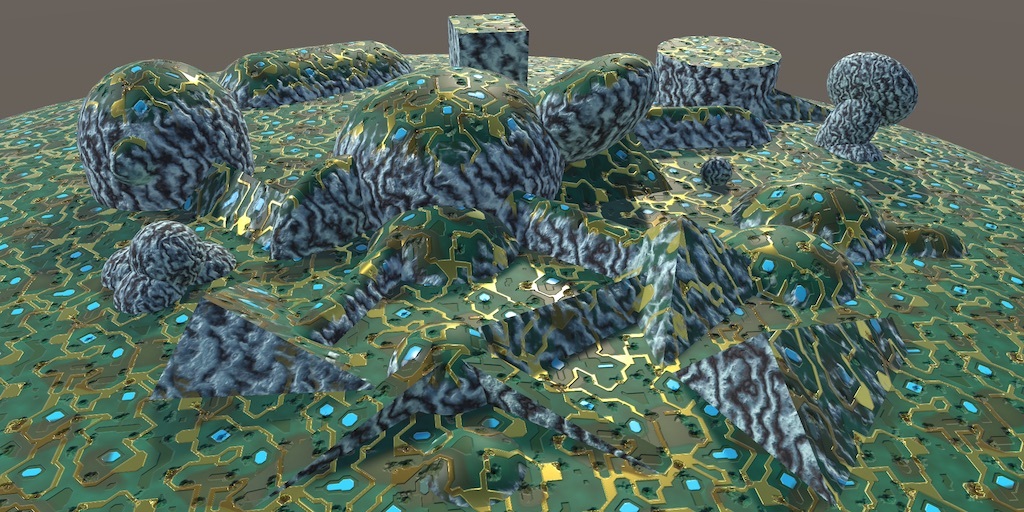
By continuing this and tinkering with other parameters and implementations such as smoothing, I eventually landed on this result:
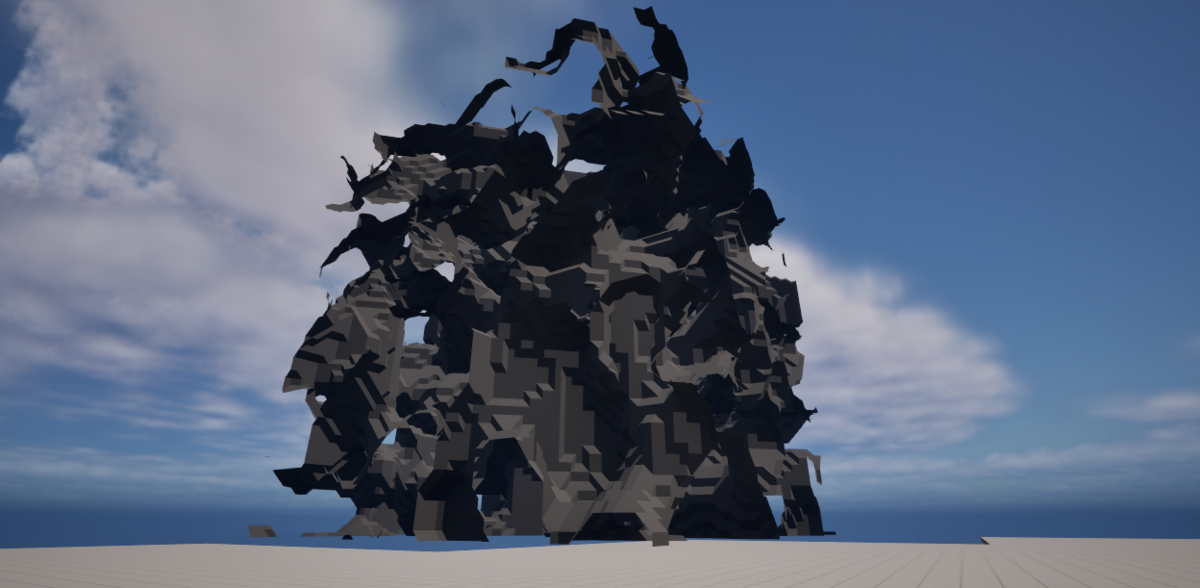
(Click to Enhance)
The smoothing logic works by manipulating the edges of each "cube" in the Marching Cubes, moving them based on the delta of their connections (from a lookup-table) and the cutoff value from the Noise itself. It then multiplies the value by the exposed Smoothness variable, allowing the user to linearly choose how jagged or smooth the surfaces become.
Noise Scale
This was pretty convincing already, having completed the general look of the Marching Cubes Algorithm already.
But it's still far off from being an actual cave. By manipulating the size of the noise on the Y-Scale we can squish it together a bit, leading to a more cave-like structure.
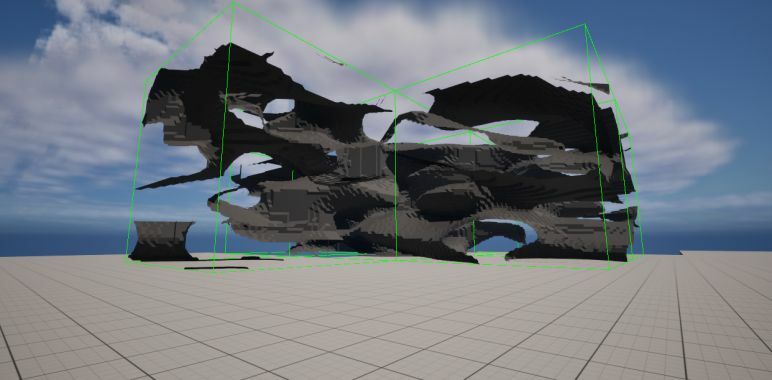
(Click to Enhance)
Now that the basic shape of the caves was out of the way, I set my sights on making it look more cave-like.
This started out with something called "Triplanar-Shaders", which are shaders which can map the given textures based on the world axis' instead of the objects normals. They work much like a cubemap where you can sample a texture from a 3-dimensional direction.
What this means in practice, is that we can differentiate which texture should be displayed on each world axis, and therefore have different textures depending on if it's the roof, walls, or floor. Using such an effect we can effectively give life to our procedural flat surface.
Jasper Flick, 2018-04-29, Catlike Coding - Triplanar Mapping [Website].
https://catlikecoding.com/unity/tutorials/advanced-rendering/triplanar-mapping/
Shaders is generally something a Programmer doesn't have responsibility to create, and are usually made by Technical Artists instead. I however felt like it could be a valuable learning experience in Unreal and decided to create the shader in their Shader Graph by following examples and modifying them. Having moderate experience from using Unity's Shader Graph helped here and there when improving the blending methods.
For the most part, the following video was used:
Rodrigo Villani, 2017, UE4 Tutorial 101 - Texture Projection 2/3 - Tri-Planar [Video]. Youtube. https://youtu.be/yP4Yhlztqw0?si=DZRwpLKp8qiEL5-f
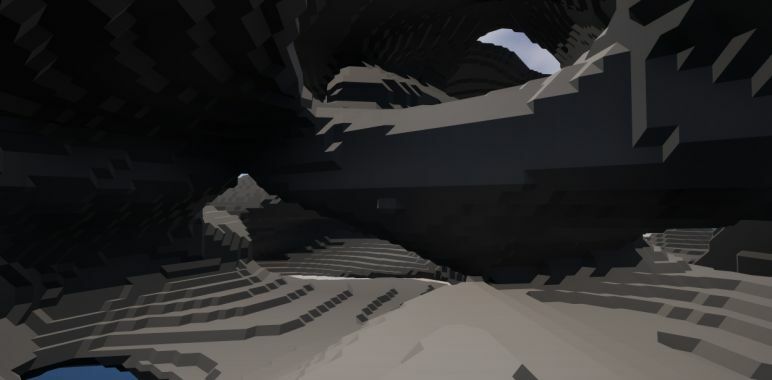
Achieving this result:
(Click to Enhance)
This was not the end of the Triplanar Shaders, as I made multiple returns to improve them over the Project's course.
If you paid attention you'll notice that the Caves suddenly have Stalactites! While the object generation system was started during this week it will instead be covered in the following chapter, where it was completed.
By creating a base script and blueprint that others can inherit for we can allow the Users to freely create new objects to be generated on the Cave Surfaces.
These objects feature an interval between two different degrees that represent what faces they can generate on. I would have liked a Radial Dial type of interface which allows the User to visually choose a Circle Sector, but I could not find any information on creating such things and decided to just move on in the project. After that we allow the User to choose a bit of randomness in the object Transforms and what Mesh & Material it should use.
Now that the objects are ready the User can freely input them in a list of generatable objects for the Chunks. When the time comes the Chunks take a last pass over all of the valid surfaces that it has found for objects and randomizes if an object should be there. Ideally the system would also check if the given object can generate in that spot without colliding with other objects, but I feared that it would take too much of the performance and thus chose to keep going.
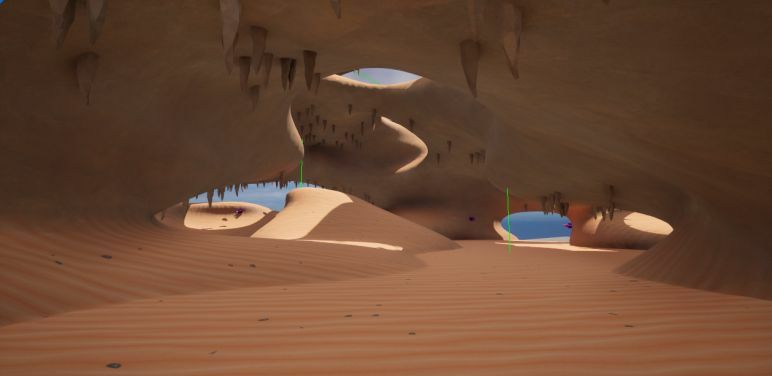
Here we have the end result of the generation system, showcasing Stalactites and Crystals which can only generate on the roof and walls respectively:
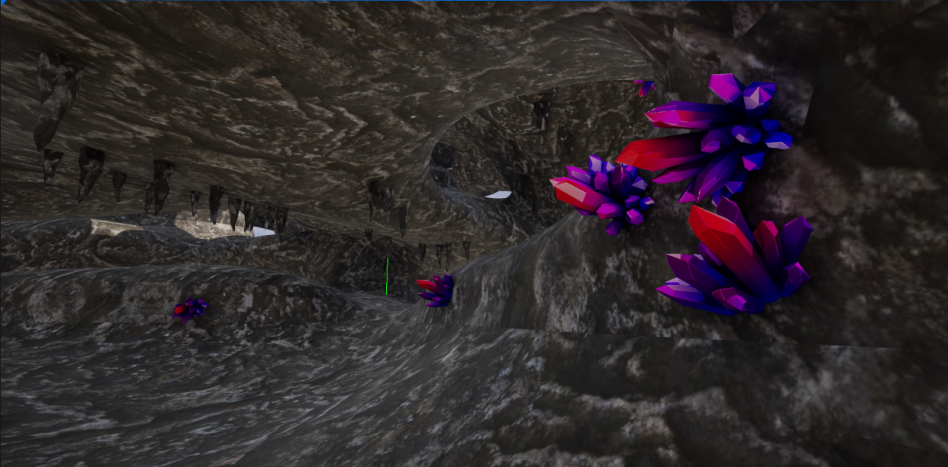
(Click to Enhance)
Noise Restructuring
The 2nd picture also showcases a better Noise system which I implemented during this week, where I made it a modular slot in the Chunk.
Noises now inherit from 1 base class, and the Chunks simply call "myNoise->GetNoiseValue(position)" to initialize their Volume Values. This 2nd type of Noise I introduced has 2 Noises of different scales that are blended together using a 3rd Noise, which can lead to the Caves having both large rooms and small corridors.
It was around this time that I started feeling pride over my Project, seeing something that could actually resemble a Cave in a Game.
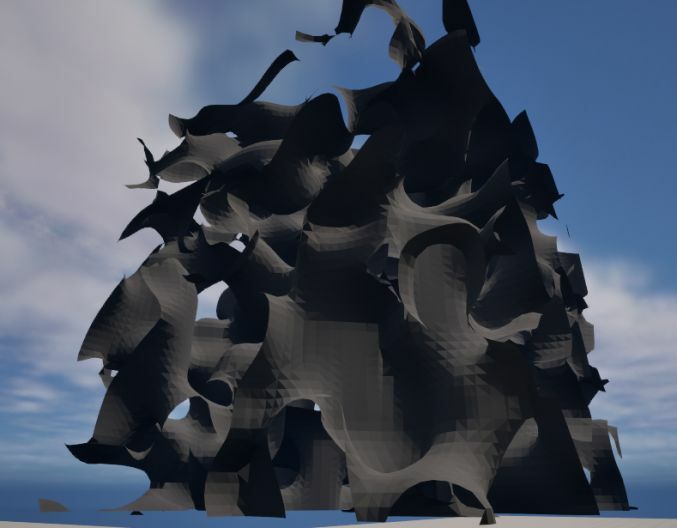
While the overall shape of the Caves was now complete, it still felt like it didn't look the part. There was only a singular repeating pattern and anomalies such as seams and harsh normals, which I decided to rectify.
The Triplanar Shader was modified to be able to handle different textures based on the world axis, and a new method for calculating vertex normals was implemented. The old minimum viable product method had each tri take their normal from the formed face, meaning they all faced the same way instead of being smoothed outwards depending on other tris.
By changing it so every vertex accumulates the normals of every tri it forms, and then taking the average, we can succesfully achieve a better looking result:
(Click to Enhance)
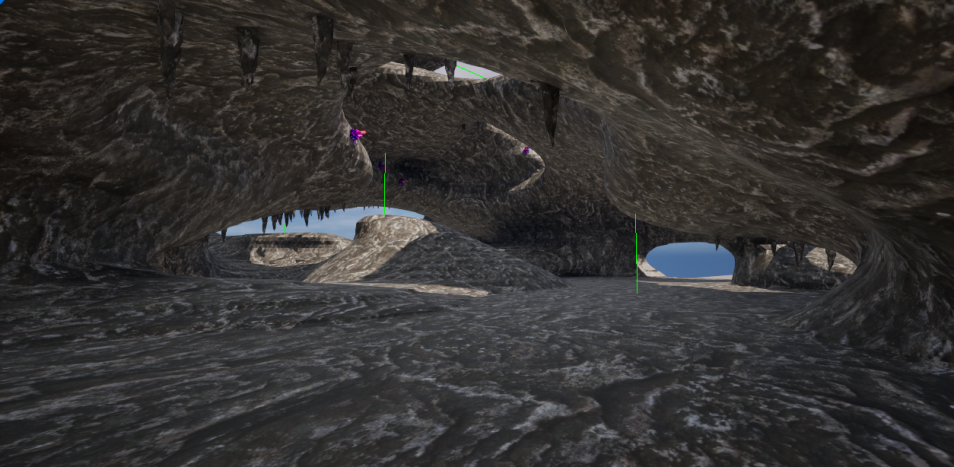
While it's not perfect, it's significantly better looking. By improving our Triplanar shader we can finally reach something that can comfortably be called near completion.
(Click to Enhance)
This week was mostly spent on Polishing and improving the UX & UI, while also implementing extras such as Infinite Generation and Mesh Deformation.
These weeks were mostly spent on this Website or my Resumé, and will therefore not be covered. These were however the Weeks that Mesh Deformation was completed.
Used Assets:
pau.raurellgomis. Low-Poly Stalactite. https://sketchfab.com/3d-models/low-poly-stalactite-a61154a4849c434faf49e42473a65062
LowlyPoly. Stylized Crystal. https://sketchfab.com/3d-models/stylized-crystal-0a0c75dab0844e7fa5b299d4af858bec
3DTextures. Stylized Sand. https://3dtextures.me/2020/06/25/stylized-sand-001/